Showing posts with label Gelleesh's Looks. Show all posts

Monday, August 22, 2011

FOTD: A Bit Like Blair


This is the look I had when we went to Bulacan for my tita's birthday last Sunday. I was all femme and proper that day and so is my makeup. As you can see, I'm wearing a bow headband again. I so love bow headband, it's makes someone look young and it reminds me of Blair Waldorf from the Gossip Girl TV series. I loved the book and I loved the TV show as well. Anyway, enough of the Gossip Girl talk and let's go on to my FOTD (Face Of The Day).

PRODUCTS USED:

FACE

> Belo Essentials Day Cover
> Beauty Treats Liquid Foundation (Beige)
> Ever Bilena Single Blush-On (Rose)
> Ever Bilena Pro Longwear Loose Powder

EYES

> Ever Bilena Color Pencil (Brown)
> White Eyeliner
> L'Oreal Voluminous Naturale Mascara
> Love & Beauty Smokey Palette

LIPS

> Watsons Moisturizing Lip Balm (Sweet Strawberry)
> MAC Satin Lipstick (Mocha)


HOW I DID IT?

We all need to use a moisturizer first before anything else. This is my new new day moisturizer so I want to include this in my FOTD. It actually has spatula which makes it easier for you to apply without dabbing your finger inside of it. After applying this, I applied the Beauty Treats foundation using my new and favorite brush from Charm Pro. It's a stippling brush and I'm so loving it right now. After evenly applying the liquid foundation, I then set it off with the Ever Bilena Loose Powder.

For the eyes, I lined my brow using the Ever Bilena Color Pencil; then, I used the gray shade from the Love & Beauty Smokey Palette on my lids, The black shade on my crease and the white shade on my brow bone. To make my eyes look less tired (because I always sleep late) I used the white eyeliner on my waterline. It will make your eyes look bigger and less tired. After curling my lashes, I used the L'Oreal Voluminous Naturale mascara to create a thicker look for my lashes.

For my blush, I used the Ever Bilena Single Blush-On applying it slantly upward to make my face look thinner. Haha! Then, for the lips, I applied the Watsons Moisturizing Lip Balm, then the MAC Satin Lipstick in Mocha for a natural and subtle look.

It is a natural but noticeable look you can use during family gatherings or on a day event. As you can see, my two zits are noticeable here. The one is under my eye on the left and the other is above my brows on the right. I'm trying to maintain a natural look so no covering up of blemishes; but the pimples are also because I forgot to take off my makeup a few times last week because I was so exhausted from work that I slept on our sofa and woke up the next day without washing my face or whatsoever. Eww right? Anyway, I have learned my lesson I hope you all love this look and if you tried to re-create this, hope you could link it below. Till next blog post! ;)

Tuesday, August 02, 2011

FOTD: Vintage Girl Makeup Look


This is the look I had today when I went to the office. It's kind of like a vintage look; plus I'm wearing a brown flowery dress so the vintage-feel is so high. Oh and the bow on my head is so cute. Agree?

So, do you wanna know how I did this look? I know you're all curious as to how I was able to do a bouffant with my hair. First of all, let's love the environment so I did not a hair spray for this look. Amazing? Here's how the back of my hair looks like:


Well, what I did was get a small part of my hair and tie it loosely. Then, I pushed it upwards and pinned it when I reached the desire height for my bouffant. Easy, right? Add your favorite head band to make it look more vintage. I used to do bouffants back in college too but I usually just use headbands with small ribbons or a headband with a vintage cameo; but today I decided to be a bit crazy and use a big bow. Haha!

Now, off to the makeup! 

PRODUCTS USED:

FACE

- Nivea Creme
- EnCara BB Cream
- Wish Pressed Powder (Beige)
- Ever Bilena Single Blush-On (Rose)

EYES

- Love & Beauty Smokey Palette
- Purple Eyeliner
- L'Oreal Voluminous Naturale Mascara
- Ever Bilena Color Pencil (Brown)
- Kawaii Liquid Eyeliner

LIPS

- Watsons Moisturizing Lip Balm (Sweet Strawberry)
- MAC Lipglass (Gitane)


HOW I DID IT?

Before anything else, make sure that you have put your favorite moisturizer. Well, my present favorite moisturizer right now is Nivea Creme. It's back to the basics and it's so much better than other moisturizers I've tried. After that, I applied the EnCara BB Cream on my face and blended it well using a Marionnaud Sponge. To set the foundation, I used the Wish Pressed Powder then I applied blush slantly upwards starting from my cheek bones.

For the eyes, I first applied a light gray shade on my lids, a matte shade of black on my crease and a white shade for my brow bone. For my brows, I made it clean and a bit thick so that it would look natural. Then, I applied the kawaii liquid eyeliner on my lids creating a double-winged cat's eye for a more eccentric effect. It's kind of not very noticeable on my pictures; but it is in person. As for my lashes, after I have curled them, I used the L'Oreal Voluminous Mascara to volumize them since I have thin and short lashes.

Now, for the lips, I applied the Watsons Moisturizing Lip Balm, then the MAC Lipglass in Gitane to make it look thicker as it will also create a pouty look.

So there, done! This is my own version of a pin-up vintage look. I hope you all love it and don't be afraid to stand out from the crowd.

Till next post!


Monday, July 11, 2011

FOTD: Being Barbie


It's been quite a long time since I last posted my look of the day and well, here is my new look. My inspiration for this is Barbie Doll. Alright, I cannot be as perfect as a Barbie doll but it's just an inspiration. I never claimed I will look like her. 

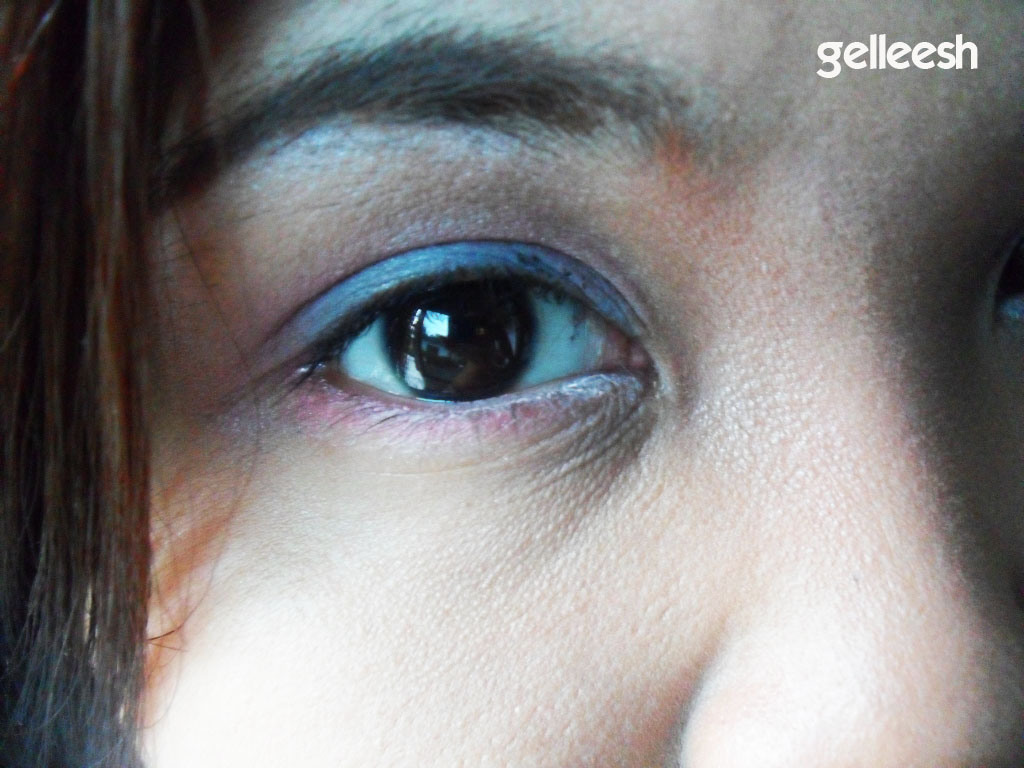
Anyway, this look is composed of mostly blue and pink. Since I cannot have blue eyes (you can if you'd be using contact lenses), I'm applying it on my eye makeup instead.

PRODUCTS USED:

FACE

- EnCara BB Cream
- Everbilena Pro Longwear Loose Powder
- Everbilena Facepowder (Honey)
-Everbilena Single Blush-on (Rose)
- Clinique True Bronze Pressed Powder Bronzer (Sunblushed)

EYES

- Dreamgirl Colors Eyeshadow (Pink)
- Mary Kay Mineral Eye Color Quad (Denim Frost)
- Love & Beauty Smokey Palette (White)
- Everbilena Color Pencil (Brown)
- Generic White Eyeliner
-L'Oreal Voluminous Naturale Mascara

LIPS

- Watson Moisturizing Lip Balm (Sweet Strawberry)
- NYX Round Lipstick (Fig)

HOW I DID IT?

I applied the EnCara BB Cream all over my face using my fingers and then blending it using a Mariounnaud sponge then I set it with the Everbilena Loose powder.


For the eyes, I first did my eyebrows using the brown Everbilena pencil. I have a new color on my hair and since it's not black anymore, brown is the better brow pencil to use. After that, I applied the Denim Frost shade from Mary Kay all over my lids using a Marionnaud N35 Eye brush. I also used the Marionnaud N37 Eyebrush to soften the rough edges. Then, I used the Dreamgirl pink eyeshadow and applied it on the crease and outer v area of the eyes and soften the rough edges again. Using the Marionnaud N38 Eye brush's slanted side, I applied the Dreamgirl pink eyeshadow on my lower lash line and then the White eyeliner on my waterline. For the brow bone's highlight, I used the Love & Beauty Smokey Palette's white shade. After curling my lashes, I used the L'Oreal Voluminous Naturale as my mascara.

For the cheeks, I used the Everbilena Blush-on in Rose and applied it on my cheeks going slantly upwards. Then I used the Clinique bronzer for contouring. I applied it with the Marionnaud N35 Eyebrush and drew a line starting from the brows going down to the tips of the nose on both sides. I blended it usung the Marionnaud N37 Eyebrush and applied white eyeshadow on the nose bridge for highlight.

For the lips, I applied first the Watsons Moisturizing Lip Balm and then the NYX Round Lipstick in Fig.

I topped it all off with the Everbilena face powder in Honey using the ELF Total Facebrush.


I love the colors I used on my eyes and the Dreamgirl eyeshadow was such a great discovery for me. It lasted long and the pigmentation is good. I will be doing my review soon plus I bought another eyeshadow from Dreamgirl. It is only PHP99.00 in some Watsons branch but surprisingly, it's only PHP94.00 in Watsons SM Valenzuela where I bought my new one.

I hope you all love this look and till next post! ;)

Sunday, July 03, 2011

FOTD: One Of The Minions


This is the look I had when I attended @PublicityAsia's (Joyce Ramirez) Minion Treat at BonChon Chicken Greenbelt 1 branch. It was an awesome meet-up organized by Ms. Joyce as she also invited Jake Galvez of Becky Nights and of course the one and only Fashion Pulis! However, enough about the gathering. I will have a separate blog post about that. This is about the look right? Haha!

Anyway, this is a simple glammed up look which is more focused on having a fierce but still not to glittered up eyes and a very calm look on the lips.

PRODUCTS USED:

FACE

- Garnier Whiten & Even Moisturizing Cream
- Neutrogena Healthy Skin Makeup (Honey Beige)
- Nichido Powder Blush (Cool Rum)

EYES

- Love & Beauty Smokey Palette
- Kawaii Liquid Eyeliner
- Wet N Wild Color Icon Brow and Eyeliner
- L'Oreal Voluminous Naturale Mascara

LIPS

- Watsons Moisturizing Lip Balm (Sweet Strawberry)
- MAC Satin Lipstick (Mocha)

HOW I DID IT?

First I did was apply the moisturizer then using my N33 Fluid Foundation from Marionnaud, I applied the Neutrogena LIquid Foundation on my face. Upon ensuring that it's equally applied all over my face, I then, used my Wish Pressed Powder to set the foundation.

For my eyes, I lined first my brows using the Wet N Wild Pencil. After that, I used the lightest brown I have closest to the white in my Love & Beauty Smokey Palette and applied it on my lids. On my crease, I used a darker shade of brown and then white for my brow bone. After that, I used the Kawaii Liquid eyeliner on my lids and applied the cat eye effect and then half way through my waterline, I applied the Wet N Wild pencil.

For the lips, I moisturized it with my Watsons Lip Balm and then applied the MAC Satin lipstick in Mocha.

Finishing touches! I used the Nichido Powder Blush in Rum and then I set the whole look using the Wish Pressed Powder again.

So that's how I created the look I wore during the Minion meet-up! I hope you loved it and wait for my post about the BonChon Minion Treat and the Food Adventure at Venice Piazza with Earth of Earthlingorgeous!

Till next look!

Thursday, June 30, 2011

FOTD: Very Pinay


I am so itching to try out my new Careline palette which I got from Ever Bilena. So basically, that is the reason why I came up with this look. I love how this look was able to enhance my skin tone. It gave me a really beautiful golden brown look; perfect for the theme since I am using a local makeup brand, why not make this look something which will enhance our beautiful brown complexion right?

PRODUCTS USED:

FACE

- Jane Agua Ceuticals Sheer Tinted Moisturizer (Medium Warm Tones)
- Wish Pressed Powder (Beige)
- Careline Palette (Red Blush)

EYES

- Wet N Wild Color Icon Brow and Eyeliner
- Careline Palette (Blue and Light Blue Shade)
- L’Oreal Voluminous Naturale Mascara

LIPS:

- Watsons Moisturizing Lip Balm (Sweet Strawberry)
- Urban Decay Pocket Rocket Gloss (Timothy)

HOW I DID IT?

Using an N33 Fluid Foundation brush from Marionnaud, I applied the Jane tinted moisturizer all over my face. I love this product because aside from the fact that it is SPF 30, it is also organic. It really does take care of your skin. To set the tinted moisturizer, I applied the Wish Pressed Powder using an ELF total face brush.

For the eyes, I first used my Wet N Wild Color Icon Brow and Eyeliner to line my brows and lengthen them. Then, I used my new Marionnaud N37 Slanted Eyeline & Eyebrows Double Side Brush to apply the blue shade from my Careline palette thinly on the lids and on my lower lash line. I used the slanted part of the brush, btw. Then, applied the lighter shade of blue all over my eyes using a technique where I start inside going outside so that the inside will only have a little of the products and more on the outside; thus making it more noticeable without overly doing it. After that, I curled my lashes and used the L’Oreal Voluminous Naturale Mascara. I remembered Michelle Phan’s tip in choosing the best mascara fit for your lashes. If your lashes are like mine, short and thin, use a volumizing mascara instead because it has a thicker formula. Thin lashes are usually too weak to hold up a wet mascara formula so if you have thin lashes and you used a mascara with wet formula, you’ll end up smudging it all over the eyes after awhile.

For the lips, I applied first the Watsons Moisturizing Lip Balm and then the Urban Decay Pocket Rocket gloss. I am not a fan of lip glosses and I am so upfront about that. I hate the sticky feeling and how my hair always sticks on my lips when it’s too windy; but to complete this look, I disregarded that. The Urban Decay Pocket Rocket in Timothy smells like caramel plus it gave my lips a natural pink glossy glow.

For the finishing touches, I used the red blush from my Careline palette and set the whole look with the Wish pressed powder.

I love how this whole look really enhances my beautiful Filipina skin tone. It gave my face a golden brown glow and I know it would look great on majority of us, Filipinas, who have the same skin tone as mine. So if you loved this look, do tell me and if you tried it, show me a picture please!
Till next blog post!

Monday, June 27, 2011

Ragdoll Inspired Look Pictorial


These are some of the pictures from our Ragdoll Pictorial. These pictures were featured in my Deviant Art Page and Facebook Fan Page. To view the complete series of these pictorial just click on THIS! Oh and they are all watermarked to prevent thieves from using these pictures without my permission. I have unwatermarked copies of these images. You would just have to ask for my permission and I'd send them in your email if I agree with where you would be using them. Oh, and no fee for it. My artworks are for free only please credit me. 

Makeup, photo and edit are all done by me. That is why I'm very particular with credits because I really did work hard for this project.

If you have requests for looks or pictorial you can contact me by clicking HERE

Friday, June 24, 2011

FOTD: Despite Being Sick


Yes, I am down with a fever today and no, it didn't stop me from wanting to look all glammed up. I believe that a bad weather and a fever shouldn't be enough reason to stop us from looking good. So even if I'm sick and all, I'm giving you all this rainy day look I have made which is also a natural look everyone can wear even if they're not going out.

PRODUCTS USED:

FACE:

- EnCara BB Cream
- Wish Pressed Powder (Beige)
- Nichido Powder Blush (Cool Rum)

EYES:

- Wet N Wild Color Icon Brow and Eyeliner
- Love & Beauty Smokey Palette (Light Gray, Gray and Lightest Brown Shade)
- Maybelline Full N Soft Mascara

LIPS:

- Watsons Soothing Lip Balm (Raspberry)
- Etude House Soft Touch Auto Lip Liner #05
- MAC Satin Lipstick (Mocha)

HOW I DID IT?

Using my fingers this time, I applied the EnCara BB Cream all over my face. To set the BB Cream, I, then applied the Wish Pressed Powder using my ELF Total Face Brush.

For the eyes, I applied the Wet N Wild Color Icon Brow and Eyeliner on my brows, the light gray shade from the Love & Beauty Palette on my lids, the gray shade on the crease area and the lightest brown shade to highlight my brows. It is the closest to the white shade so I tried using this one instead of the usual white shade I use to highlight my brows. You can use a very light brow shade as long as it is closer to white than it is to brown. After that, I curled my lashes and  applied the Maybelline Full N Soft Mascara on my upper lashes.

For the lips, I first applied the Etude House Lip liner around the shape of my lips, then the Watsons Soothing Lip Balm and after that, the MAC Satin Lipstick in Mocha.

For the finishing touches, I applied the Nichido Powder Blush in Cool Rum on my cheekbone blending it slantly upwards and then I applied again the Wish Pressed Powder to set the whole look together.

So, that is how I made the look and I hope you all love it. Despite of the bad weather, I still hope you're all doing well. Don't forget to apply mosquito repellents and I hope none of you ladies get sick.

Till next blog post! ;)

Thursday, June 23, 2011

FOTD: Going Out (Supposedly)


I was supposed to wear this look on my visit at the Peak Performance Studio for Bellyfest stuff; but I wasn't able to go there because of the rain and all. Anyway, I decided to just post this look here hoping you will love this look as well. Believe it or not, I used 2 colors on my eyes; but they are mineral eyeshadows, so they are not very pigmented. Despite that fact, I still love this look so I hope you feel the same.

PRODUCTS USED:

FACE:

- Neutrogena Healthy Skin Liquid Makeup (Honey Beige)
- Wish Pressed Powder (Beige)
- Clinique Pressed Powder Bronzer (True Bronze)
- Nichido Powder Blush (Cool Rum)

EYES:

- Mary Kay Mineral Eye Color Quad (Lemon Grass | Denim Frost | Amber Blaze)
- Lancome High Definition Mascara
- Kawaii Liquid Eyeliner
- Wet N Wild Color Icon Brow and Eyeliner

LIPS:

- Watsons Moisturizing Lip Balm
- NYX Round Lipstick (Fig)

HOW I DID IT?

First, I applied the Neutrogena Healthy Skin Liquid Makeup (Honey Beige) using my Marionnaud N33 Fluid Foundation Brush. To set the foundation, I applied the Wish Pressed Powder (Beige) using my ELF Total Face Brush. 

For the eyes, I used the Wet N Wild Color Icon Brow and Eyeliner to draw on my brows and lengthen them a bit. After that, I applied the Amber Blaze shade from Mary Kay to my lids, the denim frost on the crease area and the lemon grass shade on my brow bone. I, then, used the Wet N Wild Color Icon Brow and Eyeliner again for my waterline and applying it only half way. For my lashes, I used the Lancome High Definition Mascara.

On my lips I used a Watsons Moisturizing Lip Balm in Strawberry and then applied the NYX Round lipstick in Fig. 

For contouring the nose I used Clinique Pressed Powder Bronzer (True Bronze) to create a line on each side of my nose starting from my brow and ending on the side of my nostrils. I blended them a bit so as to look natural and then I applied the white shade of the Love & Beauty Smokey Palette to accentuate and draw attention to the slimmer part of my nose.

For the last touches, I applied the Nichido Powder Blush (Cool Rum) on my cheekbone blending it slantly upwards and then I applied again the Wish Pressed Powder to set the whole look together.

So that's how I came up with this look.This look is very fresh but the lips somehow managed to catch attention because how it transformed my lips to being small to being full and thick. I'd be posting a new look tomorrow when I finally get to go to the Peak Performance Dance Studio. If you tried out this look, don't hesitate to inform and show me. You can use other brands of makeup by the way as long as the shade is just the same. So don't be afraid to try and experiment with colors. You might be able to come up with really great looks.

So, till next look ladies. ;)

Sunday, June 19, 2011

FOTD: Playful Makeup Look


I wore this look during this year's Toycon at SM Megamall. The theme of this look is fun, light and  cute.; just like what Anime are supposed to be. If you like this one, read on to find out how I came up with this.

PRODUCTS USED:

FACE

- Neutrogena Healthy Skin Liquid Makeup (Honey Beige)
- Wish Pressed Powder (Beige)
- Clinique Pressed Powder Bronzer (True Bronze)
- Nichido Powder Blush (Cool Rum)

EYES

- NYX Jumbo Eyeshadow Pencil (Milk)
- Mary Kay Mineral Eye Color Quad (Lemon Grass | Denim Frost)
- Love & Beauty Smokey Palette (White Shade)
- Lancome High Definition Mascara

- Kawaii Liquid Eyeliner
- Wet N Wild Color Icon Brow and Eyeliner Pencil

LIPS

- Watsons Soothing Lip Balm
- NYX Round Lipstick (Fig)

HOW I DID IT?

First, I applied the Neutrogena Healthy Skin Liquid Makeup (Honey Beige) using my Marionnaud N33 Fluid Foundation Brush. To set the foundation, I applied the Wish Pressed Powder (Beige) using my ELF Total Face Brush. 

For my eyes, I used the Wet N Wild Color Icon Brow and Eyeliner to draw on my brows and lengthen them; then I applied first the NYX Jumbo Eyeshadow Pencil in Milk which will serve as my base. Afterwards, I applied the Denim Frost shade of the Mary Kay Eye Color Quad on the inner part of my lids until the crease area. Then, I applied the Lemon Grass shade, still from Mary Kay, on the outer part of my lids up to the crease area as well. Blend the part where the two colors meet so that it won't look rough. For my brow bone, I just used the White shade of my Love & Beauty Smokey Palette for highlights. After that, I applied the Lancom High Definition Mascara which lengthen and volumize my lashes but what I like about this is that it doesn't make my lashes look stiff; and since this is kind of an anime cute look, I used the Kawaii Liquid Eyeliner to create an oriental accent on my lids and then I applied the Wet N Wild Color Icon Brow and Eyeliner again but this time, half way of my waterline starting from the outer part.

On my lips I used a Watsons Soothing Lip Balm in Rasperry and then applied the NYX Round lipstick in Fig. 

For contouring the nose I used Clinique Pressed Powder Bronzer (True Bronze) to create a line on each side of my nose starting from my brow and ending on the side of my nostrils. I blended them a bit so as to look natural and then I applied the white shade of the Love & Beauty Smokey Palette to accentuate and draw attention to the slimmer part of my nose.

For the last touches, I applied the Nichido Powder Blush (Cool Rum) on my cheekbone blending it slantly upwards and then I applied again the Wish Pressed Powder to set the whole look together.

I was supposed to use false lashes; but since I'm not cosplaying this time, I decided not to because it made me look like a drag queen when I tried putting it on. I love this look because it is pretty colorful but doesn't overly done. It is easy to do as well and if you try doing this, do share it to me okay? ;)

Friday, June 17, 2011

FOTD: Keeping it Simple with a Glam


This is the look I had when I attended the DLSU Centennial. It is just a simple fresh look; but I added a liquid eyeliner as an accent so that it would still say: "I'm glamorous; but  I still keep it simple."

PRODUCTS USED:

FACE

- Neutrogena Healthy Skin Liquid Makeup (Honey Beige)
- Wish Pressed Powder (Beige)
- Clinique Pressed Powder Bronzer (True Bronze)
- Nichido Powder Blush (Cool Rum)

EYES

- Love & Beauty Smokey Palette (Light Brown, Dark Brown and White Shades)
- Wet N Wild Color Icon Brow and Eyeliner Pencil
- Maybelline Full N Soft Mascara
- Kawaii Liquid Eyeliner

LIPS

- Watsons Soothing Lip Balm (Raspberry)
- NYX Round Lipstick (Fig)


HOW I DID IT?

First, I applied the Neutrogena Healthy Skin Liquid Makeup (Honey Beige) using my Marionnaud N33 Fluid Foundation Brush. To set the foundation, I applied the Wish Pressed Powder (Beige) using my ELF Total Face Brush. 

For the eyes, I used the Wet N Wild Color Icon Brow and Eyeliner on my brows and half way on my waterline. I, then, applied the lighter brown shade on my lids, darker brown on my crease and then the white to highlight my brows. I used the Kawaii LIquid Eyeliner to line my lids and put a little oriental accent at the end. For my lashes, I just used the Maybelline Full N Soft Mascara for a more natural looking lashes. 

On to my lips, I used a Watsons Soothing Lip Balm in Rasperry and then applied the NYX Round lipstick in Fig. 

Countouring time! I used Clinique Pressed Powder Bronzer (True Bronze) to create a line on each side of my nose starting from my brow and ending on the side of my nostrils. I blended them a bit so as to look natural and then I applied the white shade of the Love & Beauty Smokey Palette to accentuate and draw attention to the slimmer part of my nose.

For the last touches, I applied the Nichido Powder Blush (Cool Rum) on my cheekbone blending it slantly upwards and then I applied again the Wish Pressed Powder to set the whole look together.

Tell me if you loved this look or if you tried it, do show it to me. ;)


Related Posts Plugin for WordPress, Blogger...